Have you ever wanted to trim a YouTube video after uploading without going through the hassle of re-uploading the entire video? Well, you’re in luck! YouTube provides a convenient feature that allows you to trim your videos after they have been uploaded.
Before we dive into the details of how to trim a YouTube video, it’s important to note that this feature is only available for videos that are shorter than six hours in duration. Additionally, it’s worth mentioning that once you trim a video, the blur feature for that video will be disabled.
Similarly, if you choose to blur a video, the trim feature will be disabled. Keep this in mind when deciding how you want to edit your uploaded videos on YouTube.

Quick Links:
Buy YouTube Views ▸ Buy YouTube Comments ▸ Buy YouTube Likes ▸ Buy YouTube Subscribers
If your unedited video has accumulated over 100,000 views, there may be restrictions on saving changes. However, this restriction does not apply to channels in the YouTube Partner Program. Now, let’s get to the steps:
Key Takeaways: Can You Trim a YouTube Video After Uploading?
- You can trim a YouTube video after uploading without re-uploading the entire video.
- Trimming is available for videos shorter than six hours in duration.
- The blur feature on a video is disabled after trimming, and vice versa.
- Unedited videos with over 100,000 views may have restrictions on saving changes.
- Channels in the YouTube Partner Program are exempt from these restrictions.
Now that you know how to trim your YouTube videos after uploading, go ahead and give it a try. Experiment with different edits and find the perfect cuts for your content. Remember to keep your videos engaging and optimized for SEO by including relevant keywords in titles, descriptions, and tags. Happy trimming!
How to Trim a YouTube Video After Uploading
To trim a YouTube video after uploading, follow these simple steps:
- Login to your YouTube account and access YouTube Studio.
- In the video manager, find the video you want to trim and open it.
- Click on the Editor option in the left-hand menu.
- In the video editor, you will see a timeline of your video.
- Drag the handles on either side of the timeline to select the portion you want to keep.
- To preview the selected portion, use the playback controls.
- Click Save to create a new version of the video with the trimmed section.
Trimming a YouTube video after uploading is a convenient way to remove unwanted parts or create shorter clips for your audience. By following these steps, you can easily edit your videos without the need to re-upload the entire content.
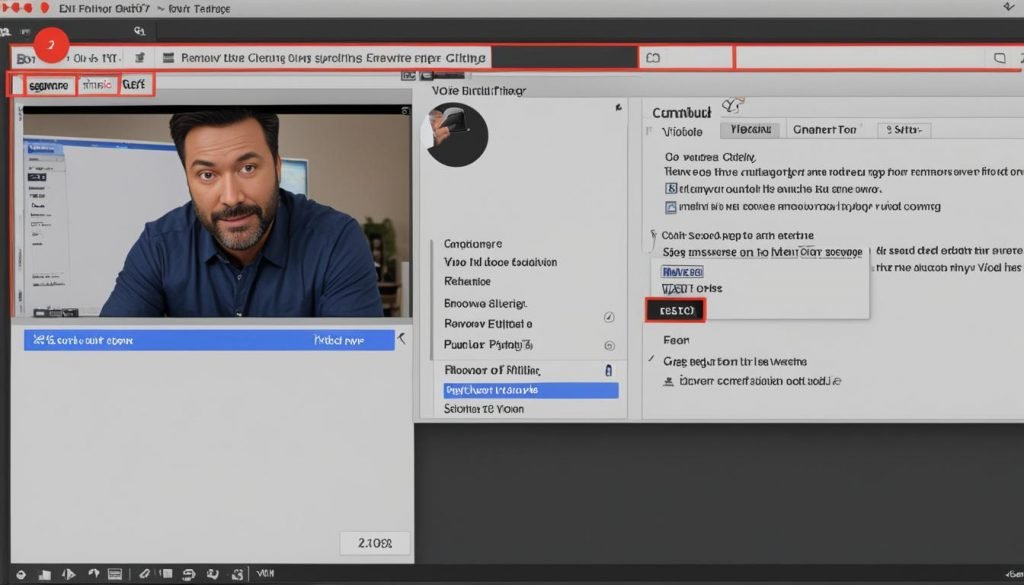
Check out the visual guide below for a clear understanding of how to trim a YouTube video:
With the ability to trim clips on YouTube after uploading, you have the flexibility to refine your videos and improve their overall quality. Whether you want to remove a few seconds from the beginning or cut out a specific section in the middle, the YouTube video editor makes it a seamless process.
How to Remove a Section from the Middle of a YouTube Video After Uploading
If you want to remove a section from the middle of a YouTube video after uploading, follow the same steps as mentioned in Section 2 to access the video editor. Once you’re in the editor, use the Trim & cut feature and click on NEW CUT. A red box will appear on the timeline. Drag the sides of the red box to select the portion you want to remove. Preview the edit and click Save to create a new version of the video without the selected section.
Removing sections from the middle of a YouTube video after uploading allows you to refine your content and deliver a more polished viewing experience to your audience. It’s a useful tool for removing any unwanted or irrelevant parts of your video or correcting any mistakes that may have occurred during the recording. By utilizing the Trim & cut feature in the YouTube video editor, you can easily edit your videos without the need to re-upload the entire content.
Follow the step-by-step process outlined below to remove a section from the middle of a YouTube video:
- Log into your YouTube account and access the YouTube Studio.
- Find the video you want to trim in the video manager and open it.
- Click on the Editor option in the left-hand menu.
- In the video editor, you will see a timeline of your video.
- To remove a section, use the Trim & cut feature and click on NEW CUT.
- A red box will appear on the timeline. Drag the sides of the red box to select the portion you want to remove.
- Preview the edit to ensure that you have selected the correct section for removal.
- Click Save to create a new version of the video without the selected section.
By following these steps, you can easily remove any unwanted sections from the middle of your YouTube videos after uploading. This feature gives you the flexibility to edit and refine your content, ensuring that your videos meet your desired specifications and provide the best possible viewing experience for your audience.
| Benefits of Removing Sections from the Middle of a YouTube Video After Uploading | Considerations |
|---|---|
| 1. Refines the content and improves video quality | 1. Ensure the removed section does not affect the flow of the video |
| 2. Helps correct mistakes or remove irrelevant information | 2. Preview the edit to avoid accidentally removing important sections |
| 3. Saves time as you don’t need to re-upload the entire video | 3. Be aware of any restrictions on saving changes for videos with over 100,000 views |
| 4. Provides a more polished viewing experience for your audience | 4. Take note that trimming a video disables the blur feature, and blurring a video disables the trim feature |
Tips for Trimming YouTube Videos Successfully

When it comes to trimming YouTube videos, there are a few key tips to keep in mind for optimal results. Firstly, it’s crucial to keep your videos short and engaging. Aim for a duration of under five minutes, as shorter videos tend to perform better in terms of viewer engagement and retention.
Next, selecting the right portion to trim is essential. Be mindful not to remove too much content, as it could disrupt the flow of your video or leave out important information. Strike a balance that keeps the video concise while still providing valuable insights or entertainment to your audience.
Additionally, make good use of relevant keywords in your video’s title and description. This will help improve search visibility and ensure that your trimmed videos are more likely to be discovered by users. Be strategic in your keyword selection, aiming to align with search intent and the interests of your target audience.
Once you’ve trimmed and optimized your video, it’s crucial to promote it across social media platforms to reach a wider audience. Share snippets or teasers of your trimmed videos to generate excitement and curiosity among your followers. This cross-promotion can help drive more views and engagement on your YouTube channel.
In conclusion, successful trimming of YouTube videos involves keeping them short and engaging, selecting the right portions to trim, optimizing for search visibility with relevant keywords, and promoting them effectively across social media. By following these tips, you can enhance the performance of your videos and maximize their impact on your audience.
Read More
- Can You Stream on YouTube and Twitch at the Same Time?
- Can You See Who Views Your YouTube Videos? Privacy Insights
- Can You See Who Liked Your YouTube Video?
- Can You See Who is Watching Your YouTube Live Stream?
- Can You See Who Disliked Your Video on YouTube?
- Pause Live TV on YouTube TV? Here’s How!
- Can You Download Shows on YouTube TV?
- Can People See What I Watch on YouTube?
- The Best YouTube Title Generator for Your Videos (2023)


